

Post by Admin on Jul 10, 2013 13:36:08 GMT -5
home
Human-Puppet Dalek Eye-Stalk Tutorial!
Ok so this is a pretty simple cosplay prop to build. I built it in a single night and kept it under $15 cost-wise.
Supplies:
-Submersible light (round ball-kind not the pill shaped one. You can get these at craft stores in the floral section and they come in a few colors. Blue or clear will work, and if you go with clear you will want to cover over the clear lens with a blue film)
-cardboard tube (toilet paper or paper towel tube will do)
-1 (one) black craft foam sheet
-1 (one) craft foam sheet somewhere close to your skin tone (you will paint over this but the edges might show so you might not want to get something say, bright red or blue or something)
-white duct tape
-acrylic paint (several colors that are close to your skin tone)
-scissors
-super glue
-SKIN SAFE double sided tape, or spirit gum
With any project, I try to start out with some rough design sketches for how I want this thing to look.
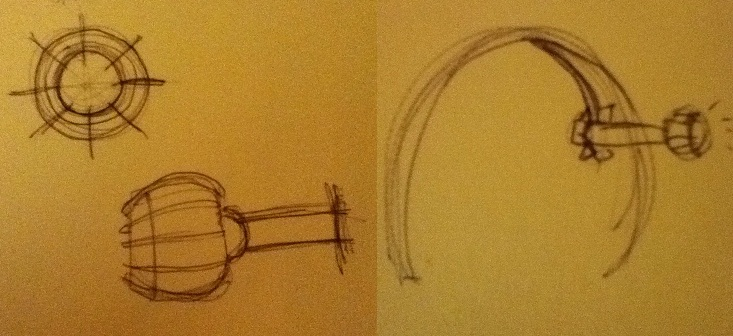
Here basically I have the eyestalk itself, and how I’m attaching this to my head, which is by a headband with an attachment hanging down to where the eyestalk is.
From here I take my cardboard tube and cut a strip out of it (maybe like, three inches long, two and a half inches wide? You can change this if you want your stalk longer/shorter or whatever). I like using the tube over a piece of flat cardboard because it already has that curl started. Curl it around a pencil/pen/marker so you get about the width of stalk you want and use your white duct tape to seal it off. Then take your light, and super-glue that sucker to one end of it
Ok, here comes about the only hard part.
You are gonna need to take that black craft foam and cut it into pieces to kind of…piece over the light.
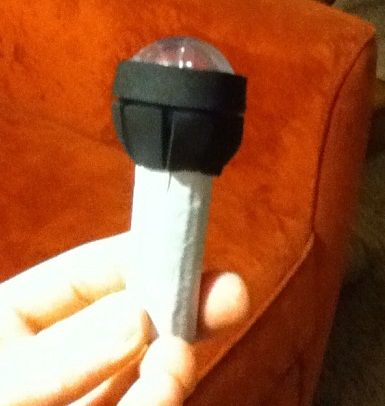
Start with basically this. The top part was easy since it was relatively flat around so I just cut a strip and glued it. The bottom (and you need to keep these separate because you want to be able to turn your light on and off) is a little trickier because you need to piece with those little tapered rectangles so it’s relatively seamless with the overall shape. The grooves between them also work double to make lining up your little…protruding bits whatever you want to call them. You want eight little tapered rectangles, and eight little crescent shapes. When I glued my crescent shapes on, I glued them both to the top and bottom half and then kind of cut them in half where the part was, which has been an issue with me now since I accidentally twisted the top off to where the battery was, and they don’t want to line up again. WHAT I SUGGEST (and what I may actually go in and do for mine) would be to only attach the crescents on the bottom half (where the grooves are) and not on the top. They will still sit nicely, just won’t have to line up.
Now you have your stalk done, you can turn it on and off, and you gotta attach it to your head. This is where you take your alternate color of craft foam. Cut two circles out of it, one smaller to go on the underside, and one larger, which will be the one on top that shows.
For the smaller one, trace the size of the bottom of the stalk, and then cut that circle into pie-wedge triangles that you are going to fold up and glue to the INSIDE of the tube. I also cut another strip and rolled it up to stick into the tube and hold those tabs secure.
The outside circle you will also cut pie-wedge taps into, but these should be wider/longer, and can be a little ‘messier’ looking. This is going to be where the stalk burst out of the forehead. Cut the circle open so you can get it around the stalk, and glue it down to the below circle, as well as gluing these tabs to the stalk, pointing up now.

From here I cut another long strip of craft foam, glued it to the circles, and then up to the headband (make sure it’s the right length that the headband sits where you want and the eye stalk sits where you want on your forehead). Wrap it once around the headband and glue it to the bottom side of the same strip. You could probably use a thinner strip of the black, to be honest, as I attached wefted hair the same color of mine to my strip and it was just more troublesome than it was worth, and you can barely see the strip anyway once it’s tucked under your hair.
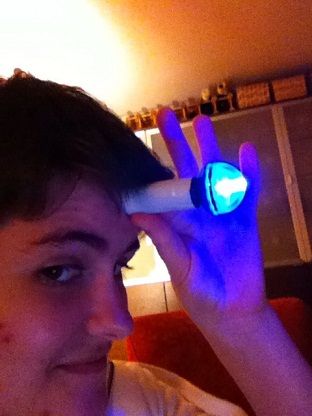
From there, all you have left is painting the ‘skin circle’ around the bottom of the stalk. I like using several colors (some warm and some cool, kind of peppering them all together) over the piece since you actually have a lot more color in your skin than you initially think! Let it dry, and then either cover the bottom of the circle with double-sided SKIN SAFE tape to attach it to your forehead, or use spirit gum to attach it. And then there you go! You are now a Human-puppet Dalek! You can even turn the light on and off so you don’t kill the batteries! :3
i1115.photobucket.com/albums/k541/wildzinakyu/6717535A-99BE-419E-A909-1CA4593AF894-120-0000000370ED758A.jpg